Over the Christmas break from work I wanted to learn something new.
I’ve been eyeing up Arduino for some time now, and for Christmas I got an Arduino UNO R3 board.
What is Arduino?
![]()
Arduino is an open-source electronics prototyping platform based on flexible, easy-to-use hardware and software. It’s intended for artists, designers, hobbyists, and anyone interested in creating interactive objects or environments.
Source: http://www.arduino.cc/
Microcontroller
Arduino is a microcontroller on a circuit board which makes it easy to receive inputs and drive outputs.
A microcontroller is a integrated computer on a chip.
Inputs
Some examples of inputs would be a temperature sensor, a motion sensor, a distance sensor, a switch and so forth.
Outputs
Some examples of outputs would be a light, a screen, a motor and so forth.
TL;DR
Arduino is a small computer that you can program to read and control electrical components connected to it.
Obtaining an Arduino Board
There are several online distributors that stock Arduino boards.
Often boards are bundled up with starter kits. Kits include a wide variety of inputs, outputs, resistors, wires and breadboards. Breadboards are solderless circuit prototyping boards that you can plug wires and components into.
Arduinos come in different flavours. Most people starting off go for the UNO board. It’s current revision is the third, hence the R3 listed by stockists.
Most enthusiasts use sites like Adafruit and Element14.
You can even pick up one from your local RadioShack.
A more complete list of distributors can be found on the Arduino Distributors page.
If you’re just getting a single Arduino board or starter kit be sure you have a USB A to B cable. Most, if not all, starter kits come with the USB A to B cable. Most printers have this type of interface so you may have this cable already lying around. The reason you need the cable is to program the device so it’s best to double check when ordering.
Programming Arduino
For the example I’m showing you’ll only need the Arduino UNO R3 board itself and the required USB cable to transfer the program from your computer to the board.
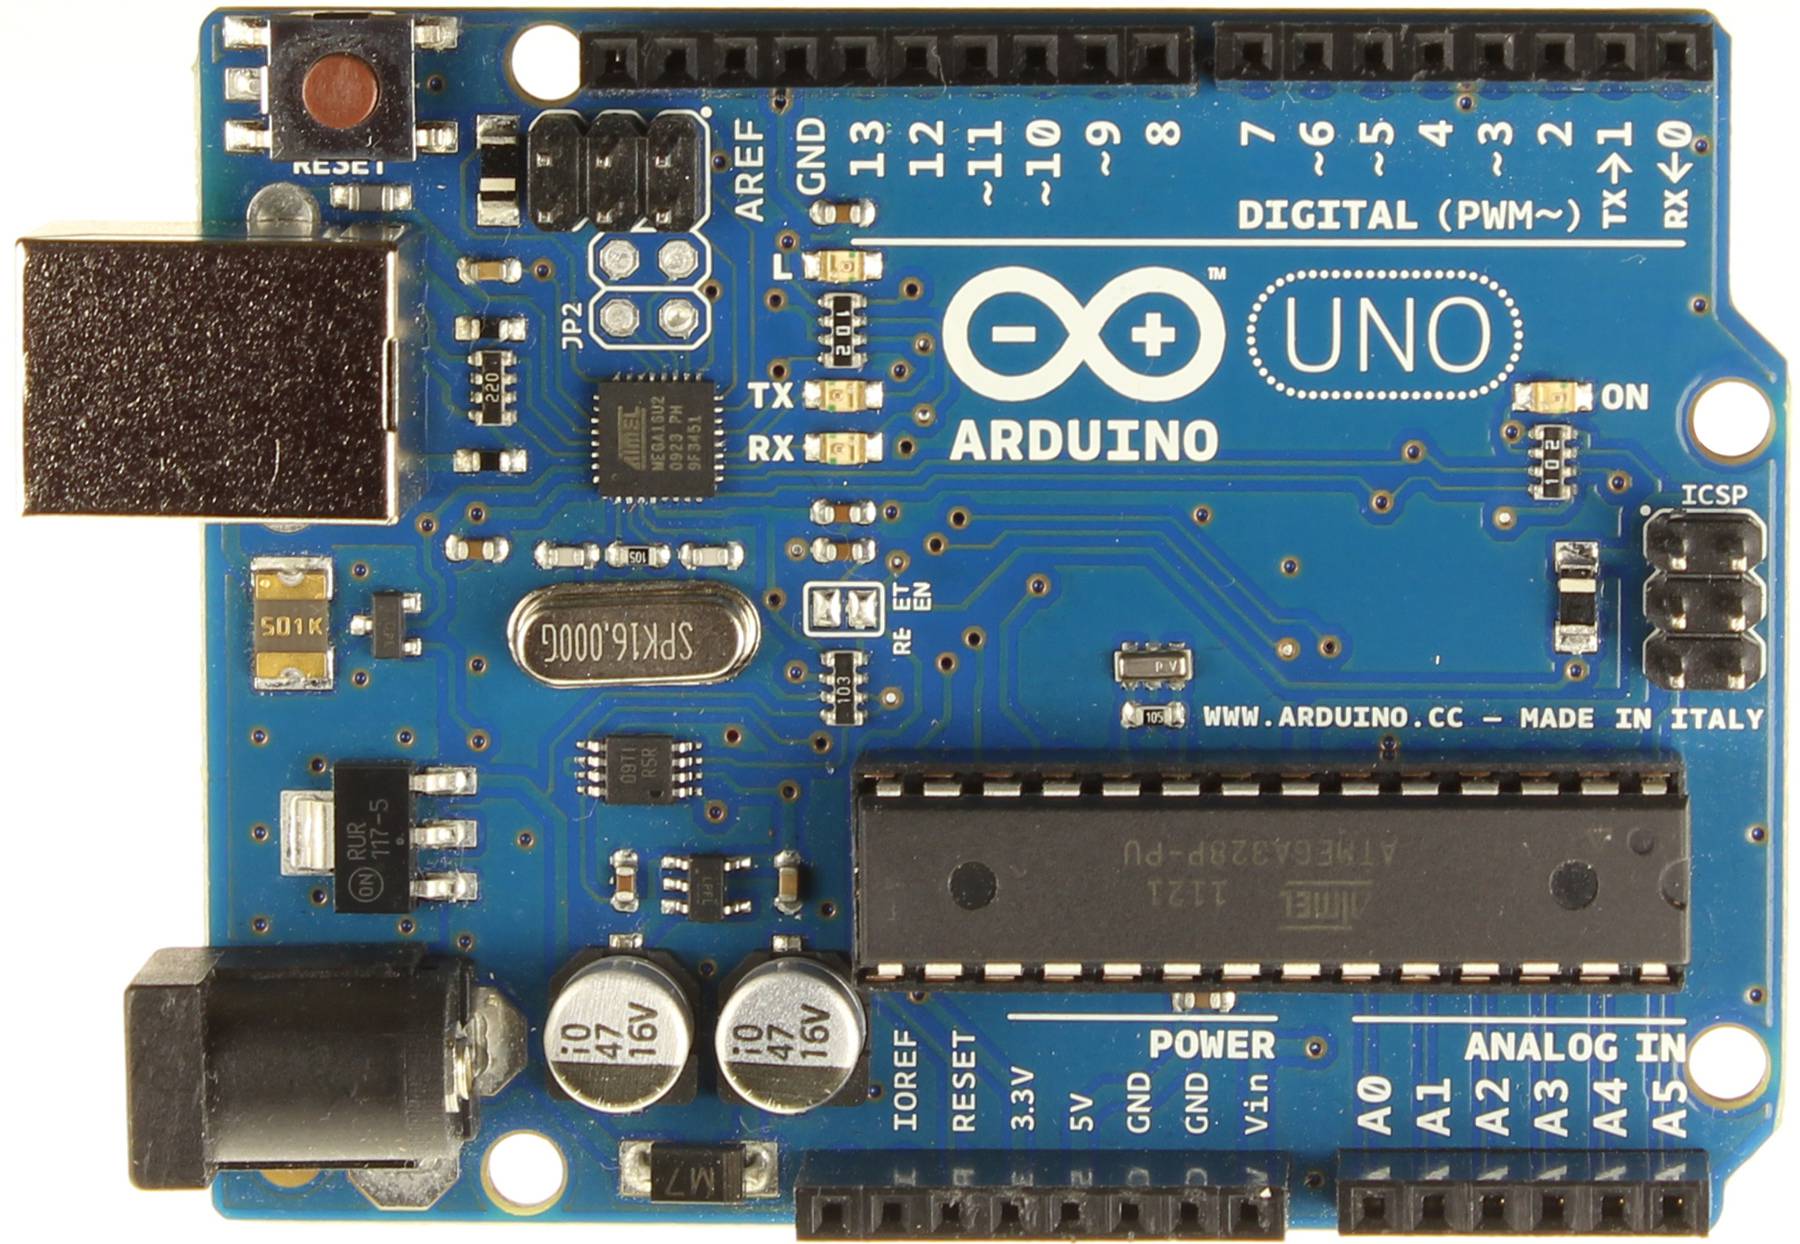
On the board left of the Arduino logo there’s an LED, short for Light Emitting Diode, a small light, with the letter L next to it.
We’re going to switch it on and off and then look in to making it blink on and off for 2 seconds at a time.
When you first plug your USB cable in to your Arduino and your computer, you may notice that this LED is blinking. Not to worry! It’s the default program stored on the chip. We’re going to override this.
The USB cable powers the device. Arduinos can run standalone by using a power supply in the bottom left of the board. Once you’re done programming and don’t require it to be constantly connected to your machine you can opt to power it separately. This is entirely dependant on the use case and circumstances you want to use the device in.
Download Arduino Software
You’ll need to download the Arduino Software package for your operating system from the Arduino download page.
When you’ve downloaded and opened the application you should see something like this:
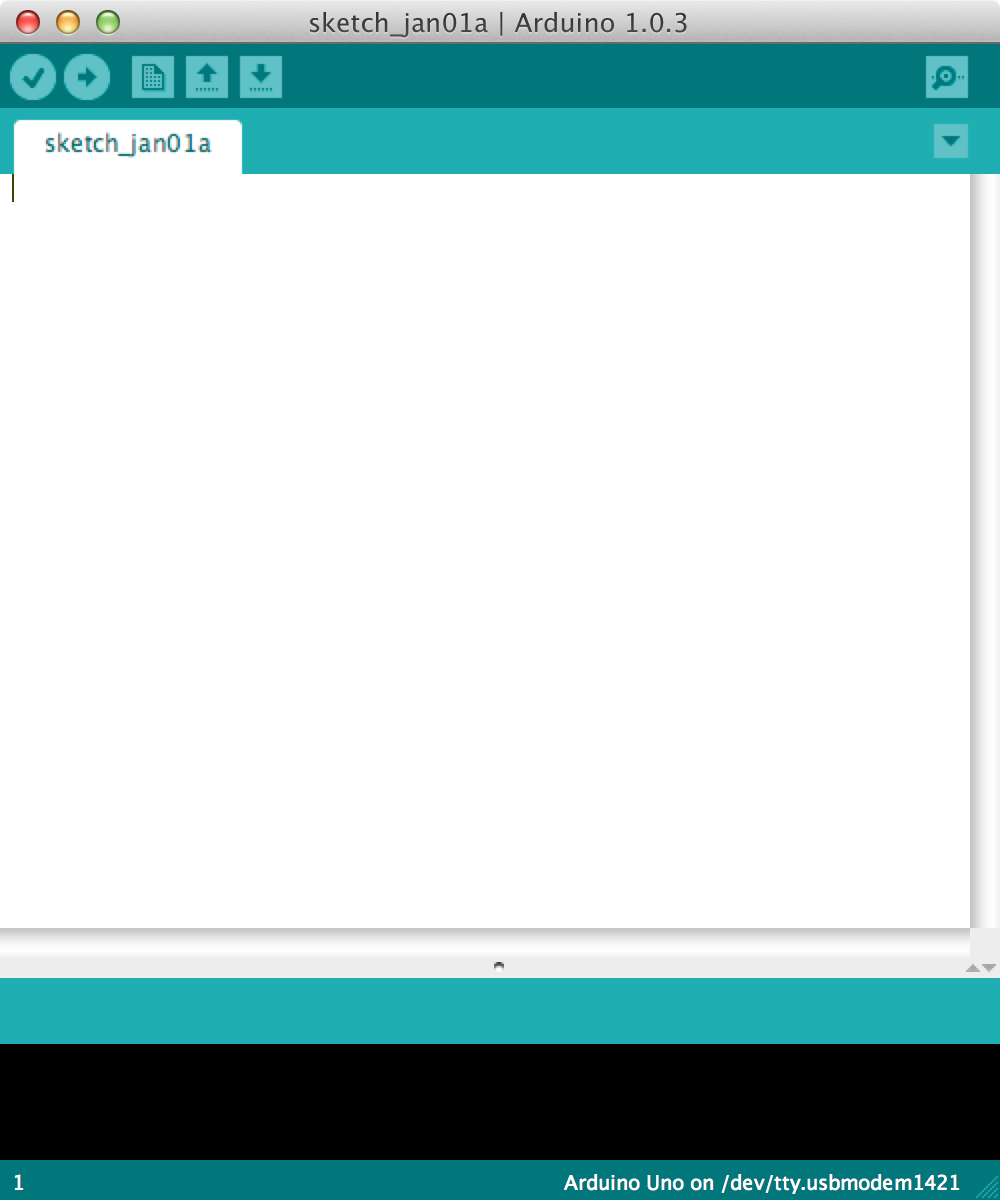
This is where you type the code you want to compile and send to the Arduino board.
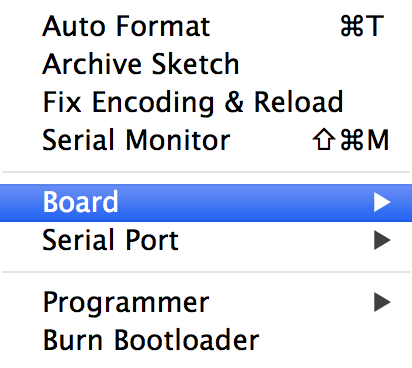
The Initial Setup
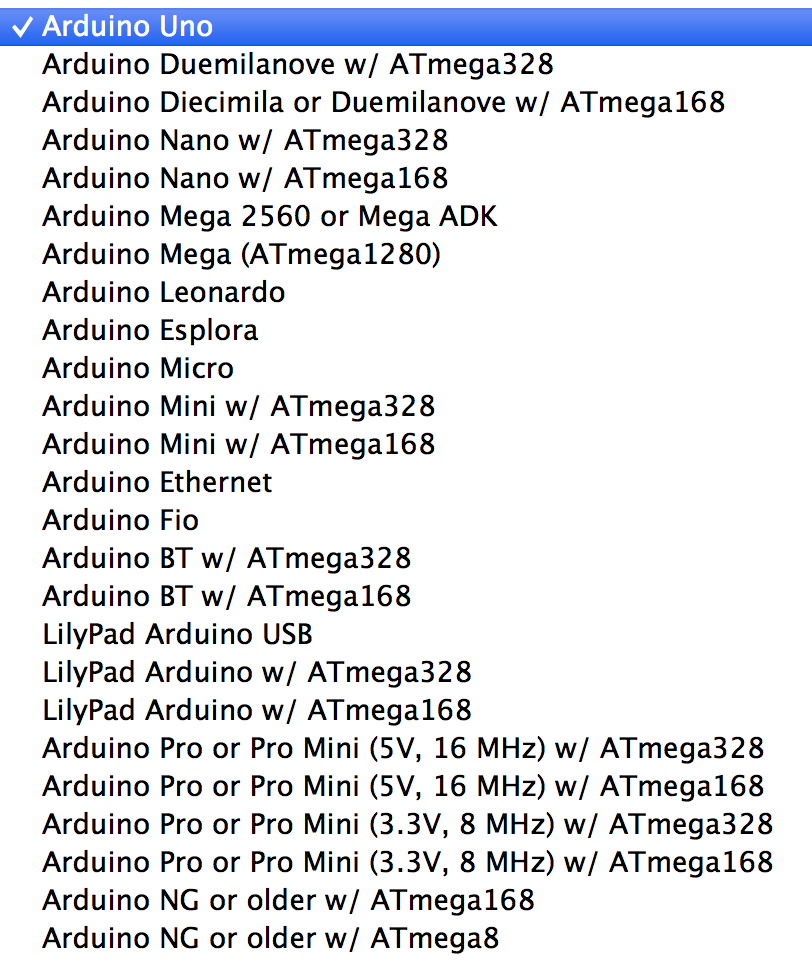
We need to setup the environment to Tools menu and select Board.
Then select the type of Arduino you want to program, in our case it’s the Arduino Uno.
The Code
The code you write for your Arduino are known as sketches. They are written in C++.
Every sketch needs two void type functions, setup() and loop(). A void type function doesn’t return any value.
The setup() method is ran once at the just after the Arduino is powered up and the loop() method is ran continuously afterwards. The setup() is where you want to do any initialisation steps, and in loop() you want to run the code you want to run over and over again.
So, your basic sketch or program should look like this:
|
|
Now we have the basic skeleton in place we can now do the Hello, World program of microcontrollers, a blinking an LED.
Headers and Pins
If you notice on the top edge of the board there’s two black rectangles with several squares in. These are called headers. Headers make it easy to connect components to the the Arduino. Where they connect to the board is called pins. Knowing what pin something is connected to is essential for programming an Arduino.
The pin numbers are listed next to the headers on the board in white.
The onboard LED we want to control is on pin 13.
In our code above the setup() method let’s create a variable called ledPin. In C++ we need to state why type our variable is before hand, in this case it’s an integer, so it’s of type int.
|
|
Each line is ended with a semicolon (;).
In the setup() method we want to set the ledPin to the output mode. We do this by calling a special function called pinMode() which takes two variables, the first the pin number, and second, whether it’s an input or output pin. Since we’re dealing with an output we need to set it to a constant called OUTPUT. If you were working with a sensor or input it would be INPUT.
|
|
In our loop we are going to first switch off the LED to make sure our program is being transferred to the chip and overriding the default.
We do this by calling another special method called digitalWrite(). This also takes two values, the pin number and the level, HIGH or the on state or LOW the off state.
|
|
Next we want to compile to machine code and deploy or upload it to the Arduino.
Compiling the Code
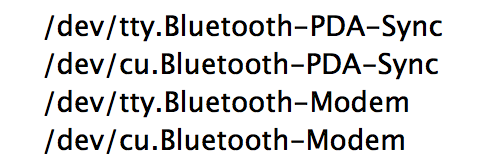
If this is your first time you’ve ever compiled code to your Arduino before plugging it in to the computer go to the Tools menu, then Serial Port and take note of what appears there.
Here’s what mine looks like before plugging in the Arduino UNO:
Plug your Arduino UNO board in to the USB cable and into your computer. Now go back to the Tools > Serial Port menu and you should see at least 1 new option. On my Mac 2 new serial ports appear.
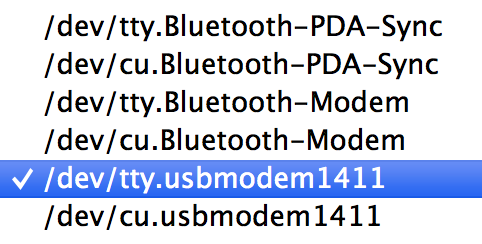
They tty and cu are two ways that computers can talk over a serial port. Both seem to work with the Arduino software so I selected the tty.* one. On Windows you should see COM followed by a number. Select the new one that appears.
Once you have selected your serial or COM port you can then press the button with the arrow pointing to the right.
Once that happens you should see the TX and RX LEDs below the L LED flash. This is the communication going on between the computer and the Arduino. The L may flicker too. Once this dance is complete your program should be running. And your LED should be off.
Now let’s try and switch it on using the HIGH constant.
|
|
Press Upload again and you should see your LED is now on!
Let’s make this a little more interesting now. We’re going to use another method called delay() which takes an integer of a time interval in milliseconds, meaning the integer of 1000 is 1 second.
So after where we switch the LED on let’s add delay(2000) which is two seconds, then digitalWrite(ledPin, LOW) to switch it off and delay(2000) again.
|
|
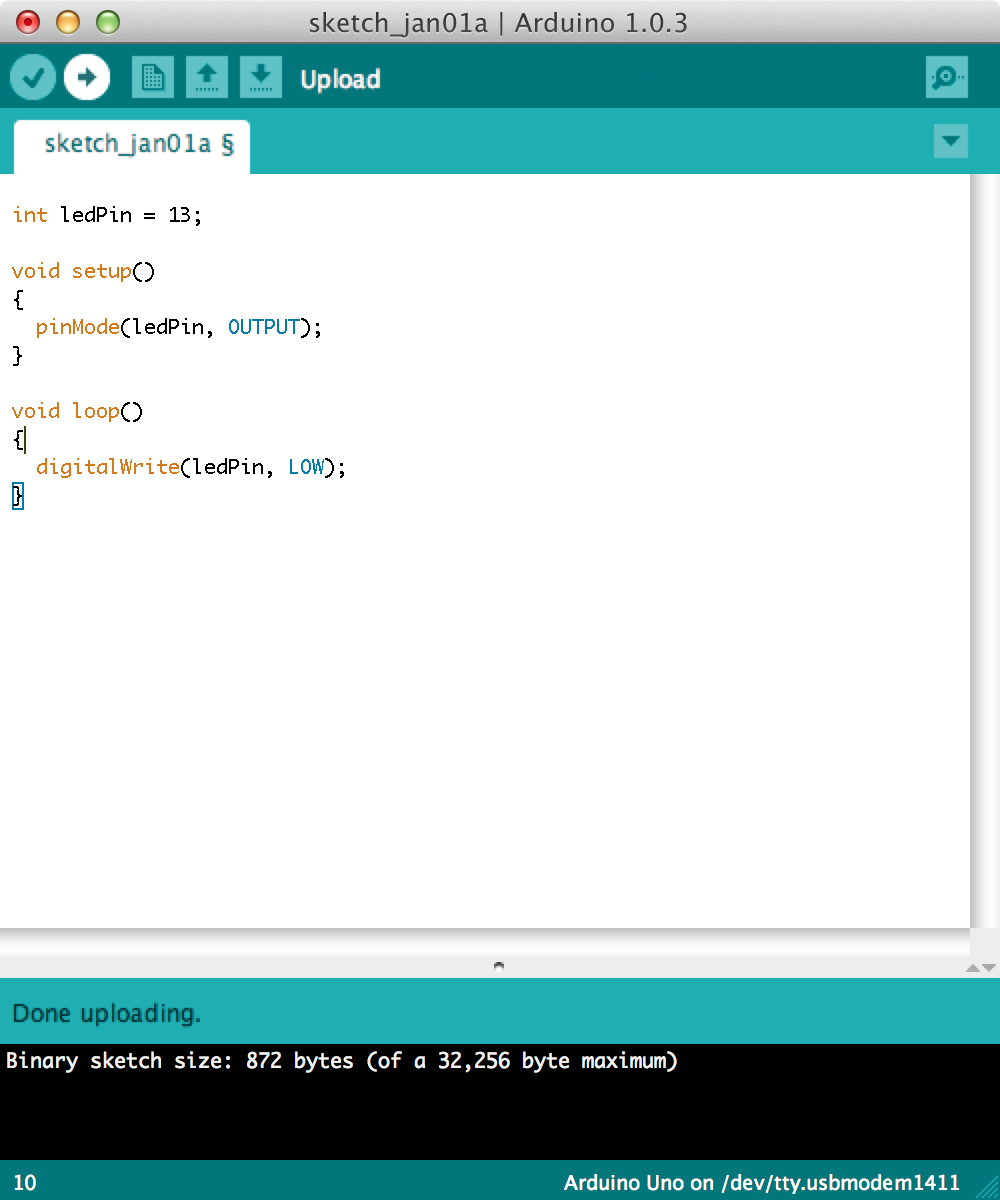
Press Upload and you should see something like this:

What next?
The Arduino platform is an incredibly easy and versatile platform to get started with. It’s open-source hardware, meaning that people can collaborate to improve, remix and build on.
It’s the brains to some of the most popular devices that are driving the next Industrial Revolution, the 3D printer.
Watch Massimo Banzi, co-founder of the Arduino project, talk about How Arduino is Open-Sourcing Imagination below:
More examples can found on the Arduino tutorials page.
For some more inspiration check out Adafruit’s YouTube channel. Here’s an example of what to expect, in this video, Becky Stern builds an Electronic Piggy Bank.
And as Massimo Banzi says “You don’t need anybody’s permission to create something great.” So what you waiting for?