Want to receive a text if there’s a bump in the night? Want an SMS if your cat is drinking from the toilet again? Want to get a text if a snooping parent or sibling comes in your room? This is a project for you!
We’re going to use an ESP8266 based WiFi prototyping development board - the Adafruit Feather HUZZAH and IoT platform Losant to send an SMS when an intruder is detected.
If you’re not familiar with Losant, Losant provides a simple way for generating visualization of all your data from all of your Internet of Things devices in customizable dashboards. Losant also allows you to respond to events coming from your devices like sending you an email when one of your devices measures a low moisture reading for one of your plants. Or even better, when your moisture sensing device measures low moisture, Losant can send a command to the watering device to start the watering cycle. The great thing is that you can modify the logic of the interaction between the devices in the Losant web app without modifying a line of code on any of your devices. This can all be done through an intuitive UI. You’ll see that in action in this project.
Bill of Materials
You’ll need the following components for this project.
- Breadboard
- Adafruit Feather HUZZAH
- Jumper wires
- Passive Infrared (PIR) Sensor
- Micro-USB cable
- Any USB power supply
Services Used
Wiring
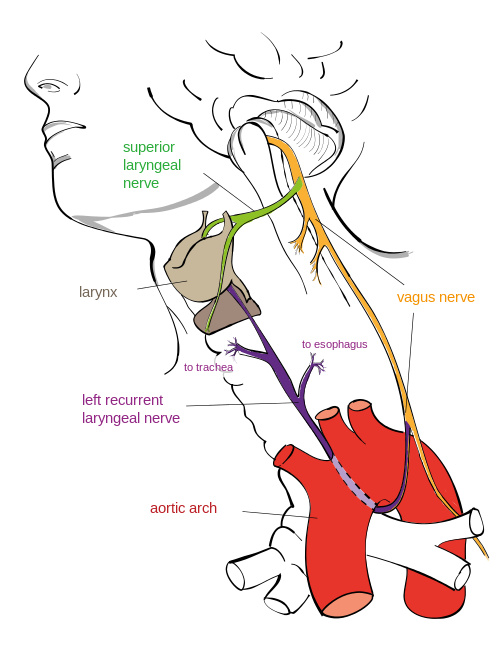
A Passive Infrared (PIR) sensor works by detecting the infrared radiation from an object - like a human or animal.
Each PIR sensor can have different pin outs. I’m using the Parallax 555-28027 PIR Sensor. If you face the sensor toward you the pins from left to right are, out to signal, power and ground. OUT will send a HIGH signal once an infrared body is detected by the sensor. Here’s a illustration of the sensor and pin out.

Here’s what the Adafruit Feather HUZZAH looks like - big style!

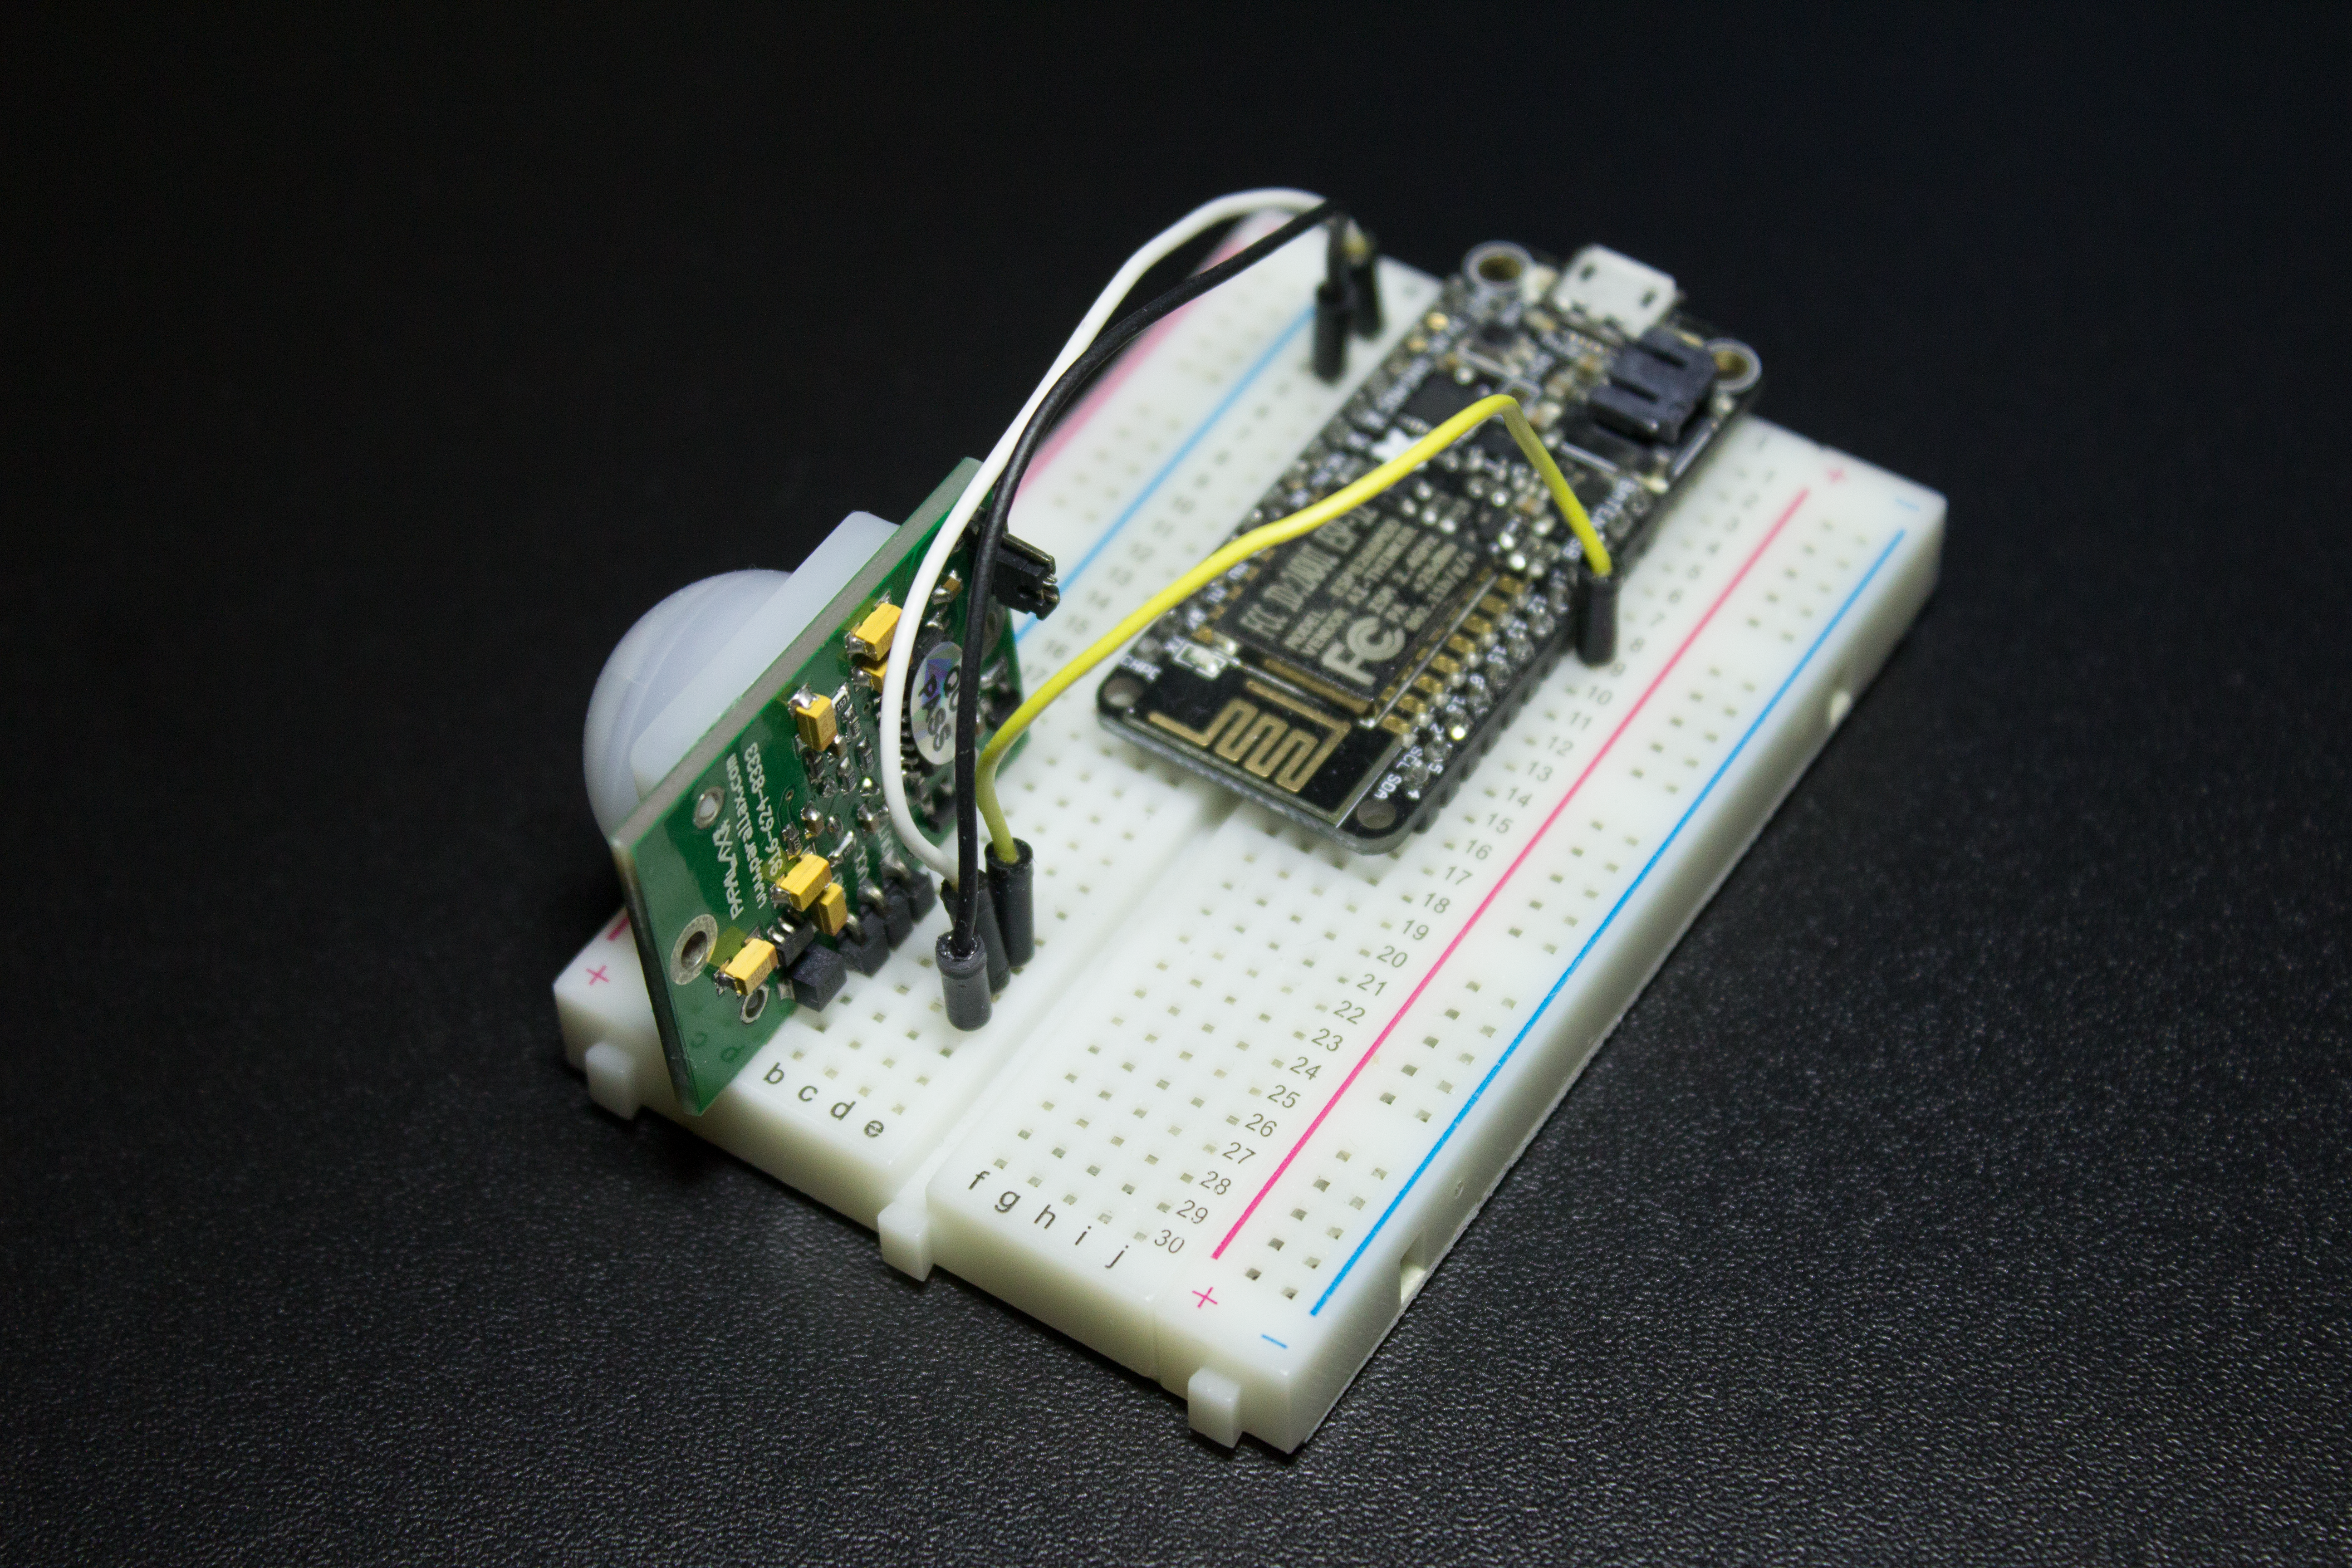
Wire up the VCC on the PIR sensor to 3V on the HUZZAH, the GND pin on the PIR sensor to the GND on the HUZZAH. The sensor should be working now. There’s a red LED that comes on when the sensor detects a body. Finally connect the OUT from the PIR sensor to any digital pin on the HUZZAH. I picked 12.

Here’s how it looks IRL.
For further reading on the PIR sensor visit the Parallex Website or Adafruit’s Learning System for the Feather HUZZAH.
Arduino Code
The Adafruit Feather HUZZAH is Arduino compatible, so we’ll be using the Arduino IDE. If you’re new to Arduino you should check out The Absolute Beginner’s Guide to Arduino.
The Arduino IDE doesn’t come working “out-of-the-box” with the Feather HUZZAH. To get it up and running take a quick detour to Adafruit’s Learning Guide. When the IDE has been set up, let’s get ready to code.
Our Arduino code needs to do the following things:
- Connect and reconnect to WiFi (
connect()andreconnect()) - Connect and reconnect to the Losant IoT platform (
connect()andreconnect()) - Read the PIR sensor (
int currentRead = digitalRead(MOTION_PIN);) - Send a message to Losant when motion of an infrared body has been detected (
motionDetected())
The Arduino code is below and requires the Losant mqtt library for Arduino. See the README.md for other dependencies.
|
|
Fill in your SSID for WIFI_SSID and WiFi password for WIFI_PASS.
This only leaves the Losant credentials.
Setting up Losant
To connect to Losant you require 3 things:
- A Device ID to identify the device from another device (
LOSANT_DEVICE_ID) - An access key (
LOSANT_ACCESS_KEY) - An access secret (
LOSANT_ACCESS_SECRET)
If you haven’t signed up to Losant yet, do that now at Losant.com - it’s free for our use case.
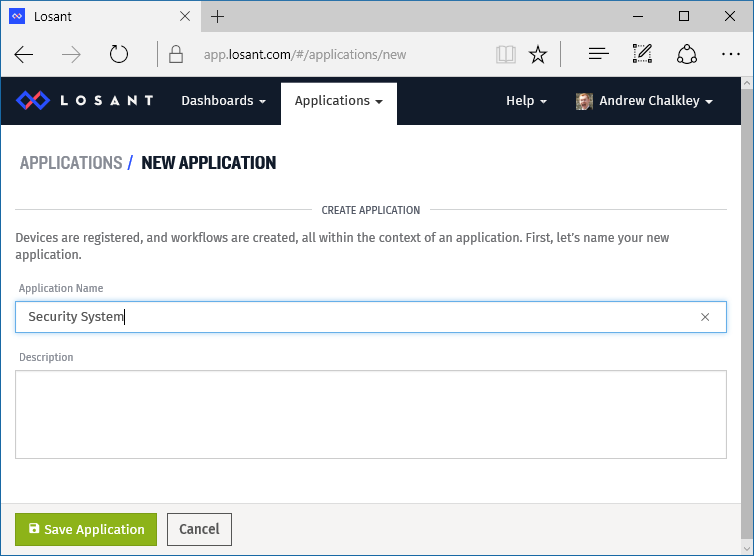
First we need to create an application by going to Applications > + Create Application from the drop down menus.
I’m calling mine Security System.
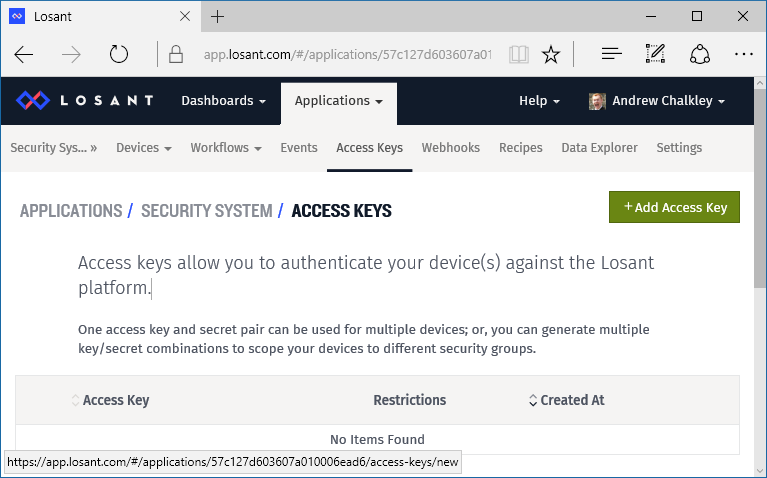
Now we can create an Access Key. Visit the Access Keys link, then + Add Access Key.
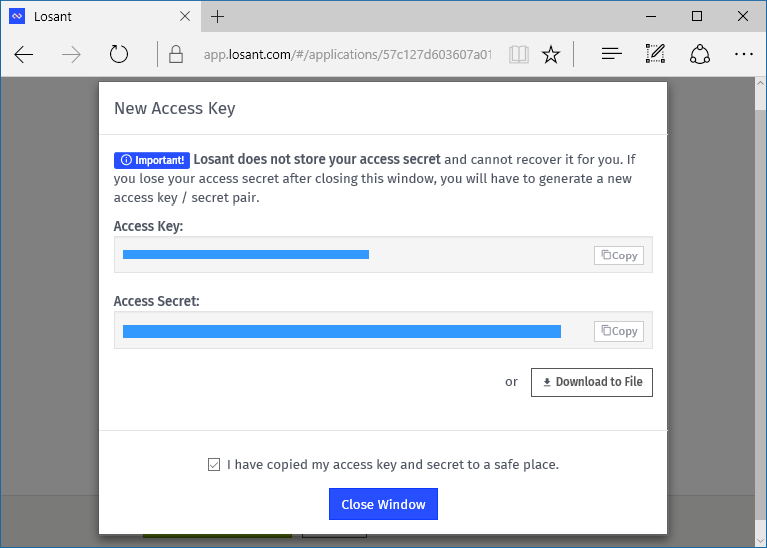
Then, simply press Create Access Key for All Devices. You’ll be presented with an Access Key and Access Secret. These will be LOSANT_ACCESS_KEY and LOSANT_ACCESS_SECRET respectively in your Arduino code. Keep your secret safe. If you loose it you have to regenerate it and update all your devices with the new secret.
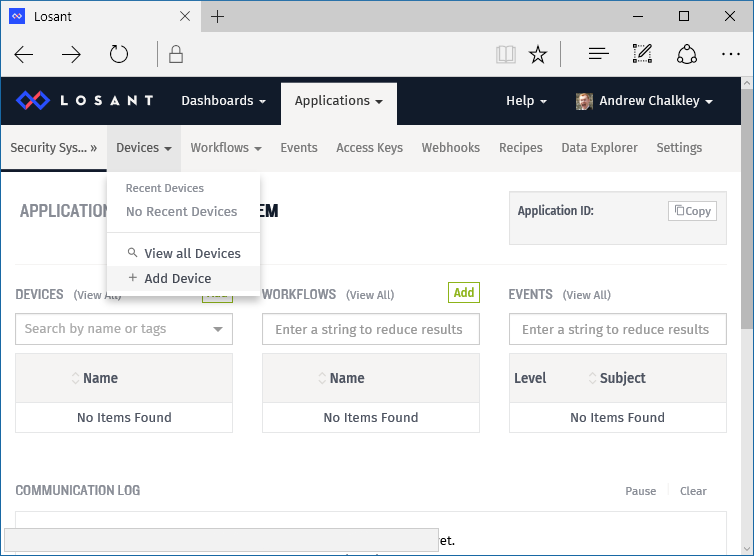
Now we need to create a device to get a Device ID to put in to our Aruino code to assign to the LOSANT_DEVICE_ID constant.
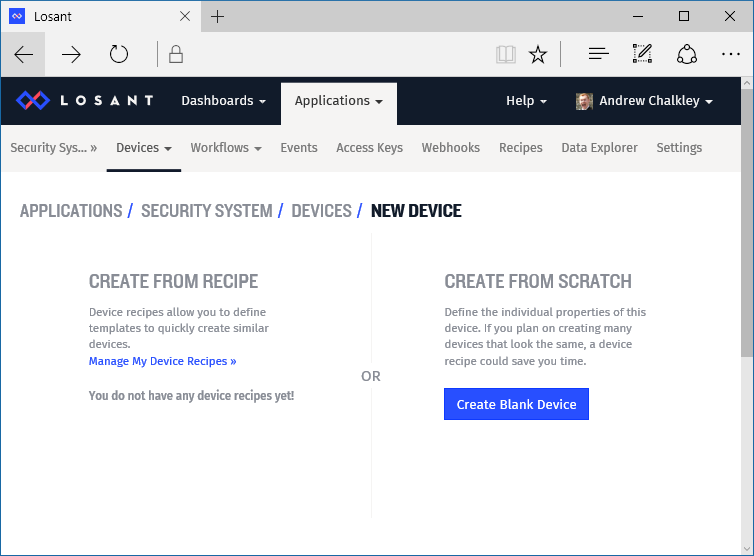
Then click on Create Blank Device.
Then we can create a new device. Let’s give the device a Name of Bedroom since this is going to be where the device will be. Then keep the Device Type set to Standalone, since it connects directly to Losant.
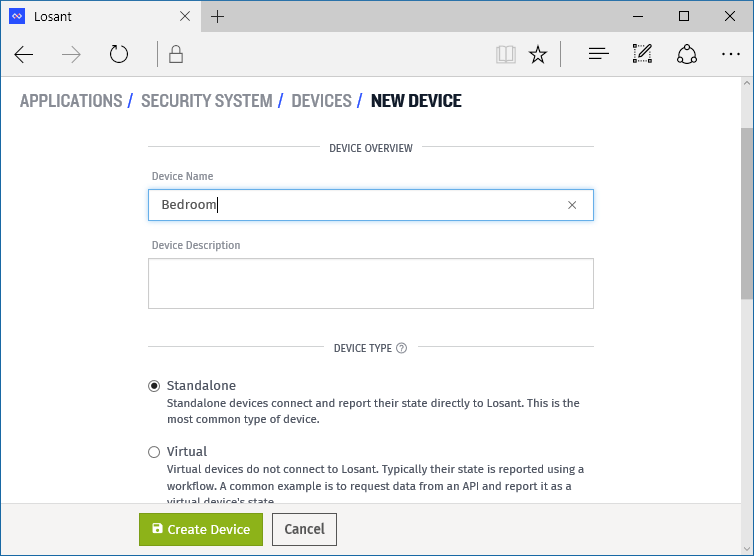
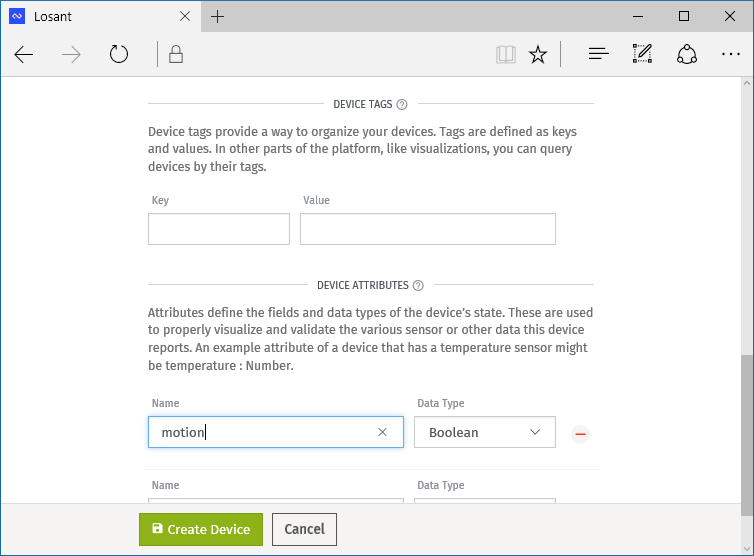
Then you can specify the Device Attributes that the device will send to Losant. In our case it’s a boolean value of motion. You can have as many device attributes as you’d like, like a temperature reading or humidity reading. Device attributes are contained in the JSON that we send from the device in the motionDetected() function to Losant.
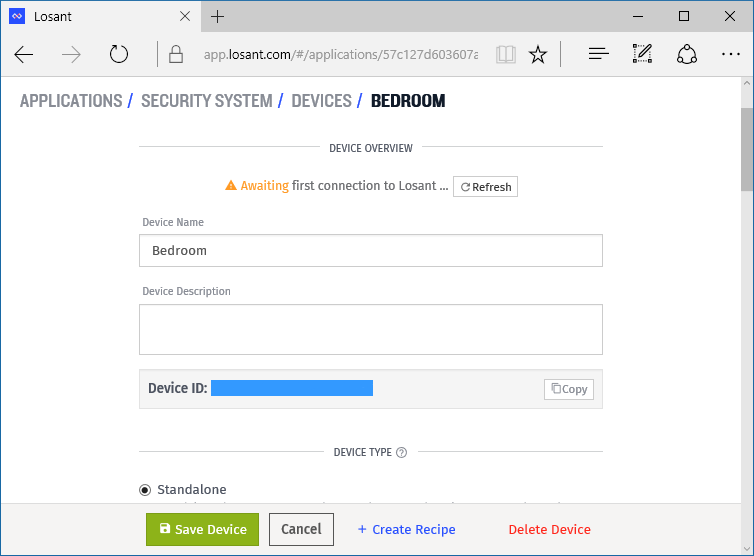
Then click Create Device. You’ll now get a Device ID. You can copy and paste that for your LOSANT_DEVICE_ID.
Awesome, we have all the required strings for the Arduino Skecth. Update the values for LOSANT_DEVICE_ID, LOSANT_ACCESS_KEY and LOSANT_ACCESS_SECRET and Upload your Arduino Sketch to the Adafruit Feather HUZZAH.
The final step is to get Losant to send us a text message when the motion state is true. To do this we need to create a Workflow. A Workflow is work triggered by your device’s states. In our case we want Losant to send an SMS message (the work) when the motion event occurs and is the value of true.
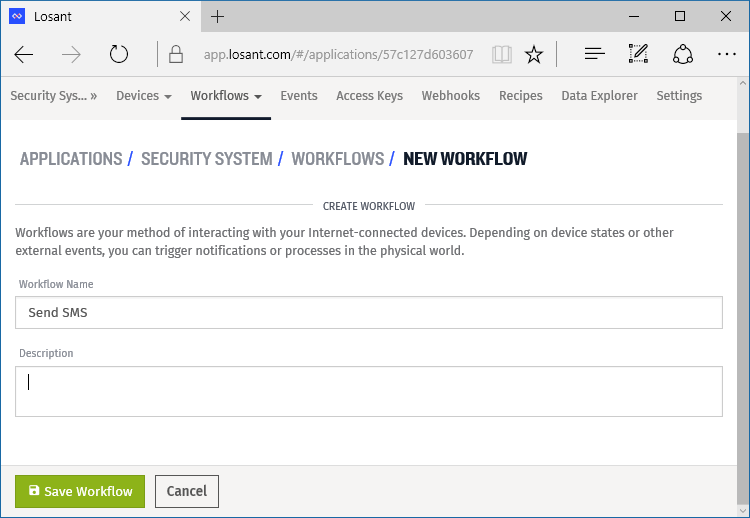
Create a Workflow from the drop down menus.

Enter in a Workflow Name like Send Notification or Send SMS and press Save Workflow.
You are now presented with a simple drag and drop interface to create your workflow. First drag Device from Triggers in to the grid in the center of the screen.
Then drag Conditional from the Logic panel.
We then want to add the expression of…
{{ data.motion }} == true
…in the Expression section of the Conditional panel.
Now let’s drag SMS from the Output section and type in your cell phone number in the Phone Number Template.
Then connect the nodes of the workflow together. Be sure to connect the green connection point on the Conditional to the SMS node. This means the condition has evaluated to true.
Oh, let’s not forget to include a Message Template of Motion Detected!.
Finally, we Deploy Workflow, meaning it’s ready to work when events come in.
Unplug your device and set it up where you want to have it.
Now it’s time to see if it works!
And it does! Awesome!
Conclusion
Losant limits the SMS service to 1 per minute, which is fine for our purposes, but you can integrate with third party services such as telecom API provider Twilio which doesn’t have that restriction.
Taking the project further, you may want to add a button to “Arm” the device, with an LED indicator, so it doesn’t send the motion detection JSON when you’re expecting movement.
If you like this project why not give it some Respect on Hackster.io?
]]>